
Using Videos Assets (2D, 2D with Alpha, 360)
Videos are very powerful media when you want to create engaging experiences, with AR-media Studio you can use them in several ways, for example by anchoring them:
- To a planar trigger (like a poster or a magazine’s cover)
- To a specific point in the space around you
- To a know location specified in terms of its longitude and latitude
Or you can:
- Play them full screen onto the user’s mobile device display
- Use them as background of 360 Scenes
Video assets can be of three kinds:
- 2D videos
- 2D videos with alpha
- 360 videos
To add a Video asset just click the + button in the Assets Manager‘s toolbar and select the Multimedia Asset type, a popup will be displayed:
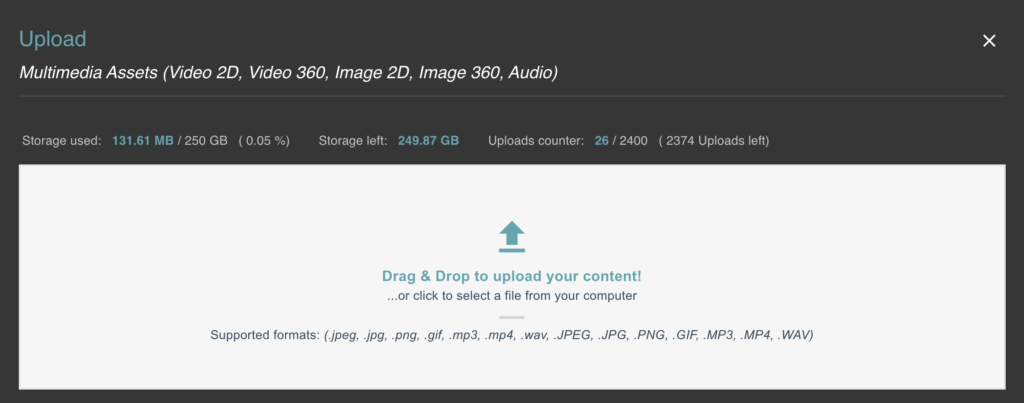
Drag & drop the chosen file into the provided area.
Requirements
Regardless of their purpose the supported formats and recommendations for Video assets are the following:
- File types: MP4, MOV
- File size (MB): < 25
- Resolution (pixels): < 1920 x 960
- Bitrate (Mb/s): < 3
- FPS: 30
Working with 2D Videos and 2D Videos with Alpha
2D Video assets can be added only to AR Scenes (planar, spatial or geo-localized). To use the 2D Video asset into a scene just click the Video 2D toolbar button in the Scene Editor:

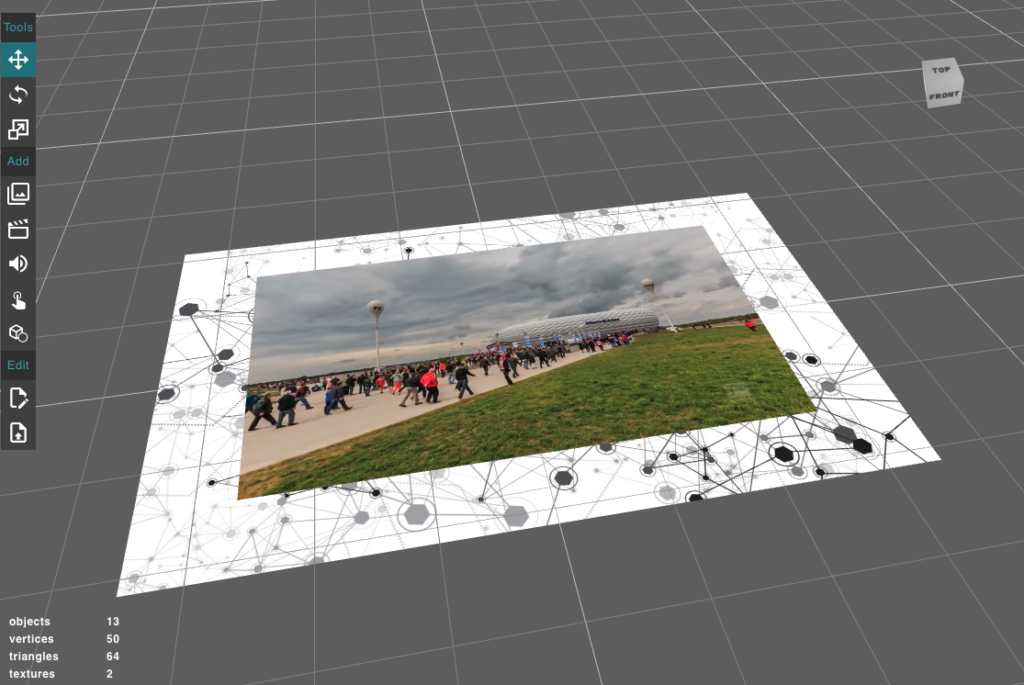
When you click the “Video” button in the toolbar the Assets Manager will show only suitable video assets for you to select, once you have made your choice the selected video will appear in the Scene Editor:
You can use the video playback controls to preview the added Video asset in the Scene Editor.
Getting More with Transparency (Alpha Video)
You can create even more engaging effects using videos with alpha channels, for instance you can make a magazine’s cover come literally to life by creating the illusion of printed objects moving on the cover’s surface or you can let the user think that the cover itself gets built by assembling different parts.
To create a 2D Video with Alpha asset you must provide two separate files: a standard video without alpha channel and another video that represents only the alpha component. Both videos must be the same resolution, once they are uploaded they get converted into a single asset and you can use it for your scenes as you would with a standard video.
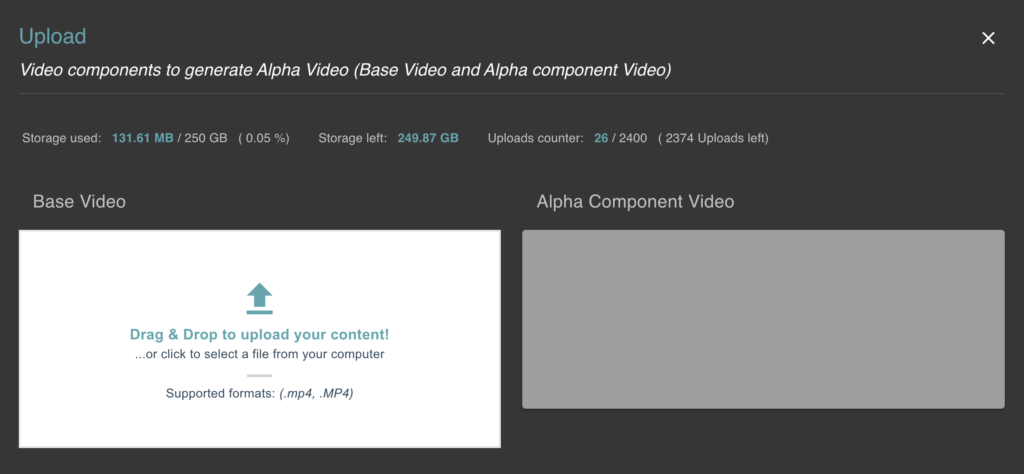
The 2D Video with Alpha asset is added using a specific option available when you click the + button in the Assets Manager, the “Alpha Video” option which will open the following popup:
NOTE: To add a 2D Video with Alpha you do not use the Multimedia Asset option.
2D Video with Alpha assets can be added only to AR Scenes (planar, spatial or geo-localized). To use the 2D Video with Alpha asset into a scene just click the “Video Alpha” toolbar button in the Scene Editor:

When you click the “Video Alpha” button in the toolbar the Assets Manager will show only suitable video assets for you to select, once you have made your choice the selected video will appear in the Scene Editor.
Working with 360 Videos
You can create 360 panoramas not only using static images but also using videos. In order to use a 360 Video the only requirement for the video itself is to be in the equirectangular format, this meaning to have a 2:1 aspect ratio. You upload 360 Videos the same way as you do with other multimedia assets.
360 Videos can be used only as background of 360 Scenes, to add a 360 Video asset to a scene, in the Scene Editor click the corresponding toolbar button:

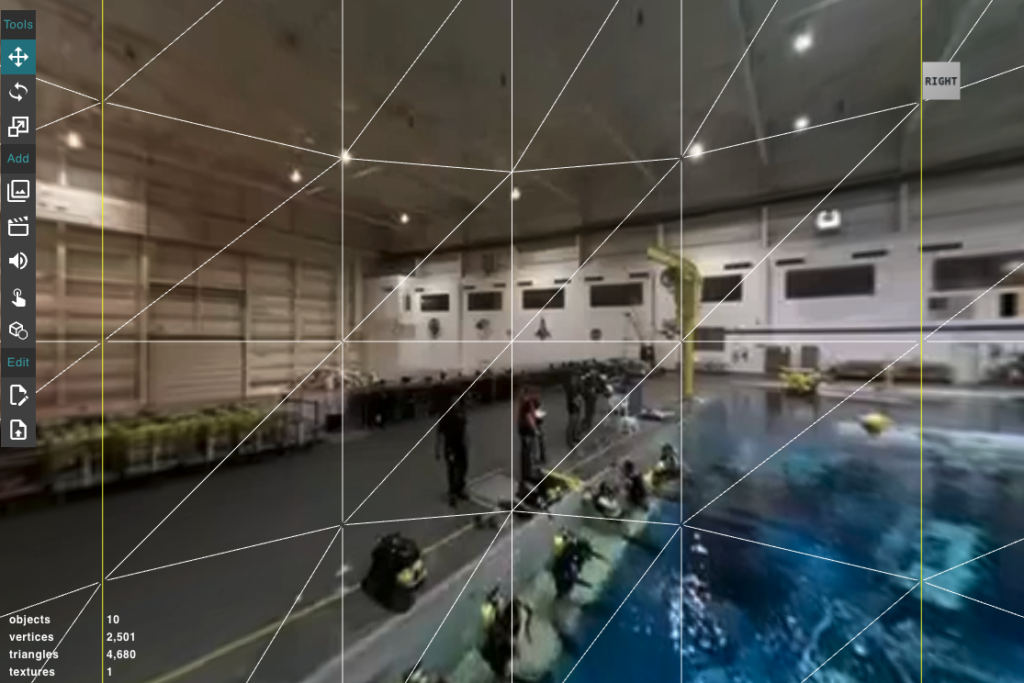
When you click the “Video 360” button the Assets Manager will allow you to select only that kind of asset and when you pick a suitable asset it will be displayed in the current scene:
You can use the video playback controls to preview the 360 Video in the Scene Editor.