
Visualization Modes (3D Models)
Introduction
When managing a model within the Asset Manager you have the possibility to choose what kind of visualization mode you’d like to use for that specific model. In most cases you can just keep the default choice and your models will look just fine, but if you want more control on the visual appearance of your content then you can use visualization modes to suit your needs more. You can modify the visualization mode for any imported model by selecting it in the Asset Manager and using the model’s details panel to change the mode (and a few more options) if you want.
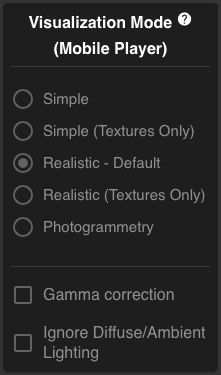
As you can see, beyond the visualization mode itself, you can opt-in for two more parameters, specifically:
- Gamma correction
- Ignore Diffuse/Ambient Lighting
We will see what they mean and how to use them later below.
NOTE: Visualization modes affect only the appearance of models when displayed in the AR-media mobile player app, not in the Scene Editor.
Before looking at the details of each visualization mode you should be aware of how the rendering of 3D models happens. First of all, the appearance of a 3D model is determined by the materials it uses and a material, usually, is defined by a set of colors (diffuse, ambient, …) and a set of textures maps (diffuse, ambient, normals, opacity, …). The way the rendering engine mixes and uses those colors and textures is determined by the shading method and illumination model employed and using the AR-media Studio platform you can have control on all the above things.
Shading and Visual Appearance
The main shading methods for real time Computer Graphics are Gouroud and Phong, the former computes the shading of a surface only considering information available at the vertex level (and this information is interpolated on all the surface), the latter computes the shading at the pixel level, this meaning for each visible point on the model’s surface:
As you can see, the Phong shading method is more accurate but it is also more demanding in terms of computational resources. Using the Phong shading method you can not only have a smoother look of the model’s surface, but also leverage on advanced effects like accurate normals and specular highlights that yields for a more realistic appearance.
Regarding the types of textures maps supported by the AR-media Studio platform, so far, they are:
- Diffuse Map
- Emissive Map
- Opacity Map
- Normal Map
Depending on the 3D authoring software you use, they may be called slightly differently, anyway in order to define each map we examine the effect they are supposed to produce.
Diffuse Map
The Diffuse Map is used to provide the main color of the surface (wood, fabric, concrete, …), for example:

NOTE: The Diffuse texture map is generally mixed with the model’s material diffuse color, this meaning that if the color is something different than white the model’s final color may look darker than the employed texture or even tinted with the diffuse color of the material itself. As you will see you can ignore the material’s color contribution and use only the textures color if you need so.
Emissive Map
The Emissive Map is used to simulate the ambient occlusion contribution(or global lighting in general). Using a 3D authoring software you can use Render to Texture technique to bake global illumination into a texture and use it as an emissive map to greatly improve the visual appearance of models.
In emissive maps white means bright/lit whereas black means dark/shadow.
NOTE: When using Emissive Map it is advisable to also turn ON the “Ignore Diffuse/Ambient Lighting” option otherwise the pre-calculated shadowing would be affected by the real-time lighting computations and the final appearance of the model would be different than what you expect.
Opacity Map
The Opacity Map leverages a black and white image that is used to make part of a model’s surface transparent (black) or opaque (white).
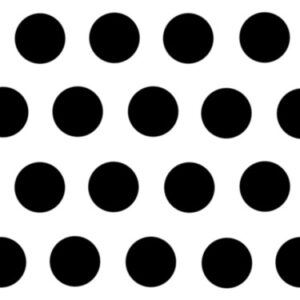
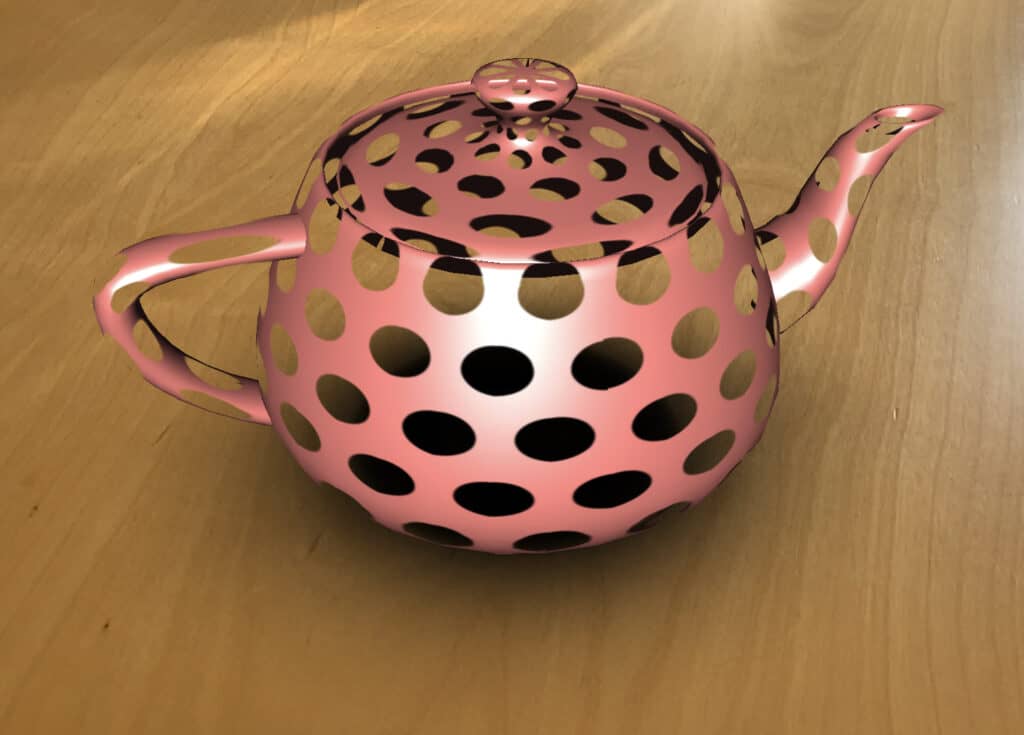
NOTE: You can leverage on opacity maps to add details to the model’s surface, for example create foliage, fences, holes and so on.
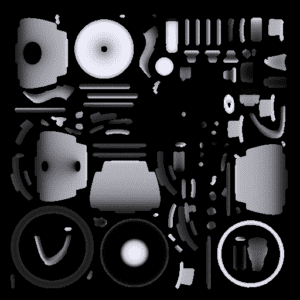
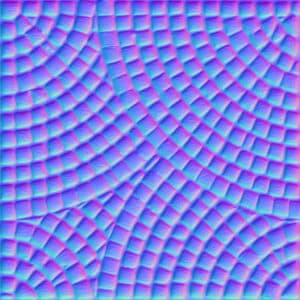
Normal Map
A Normal Map is used to add details to the model’s surface, usually a normal map looks like the following image:
Using Visualization Modes
Let’s put the above information together and examine each visualization mode in detail.
Simple Mode
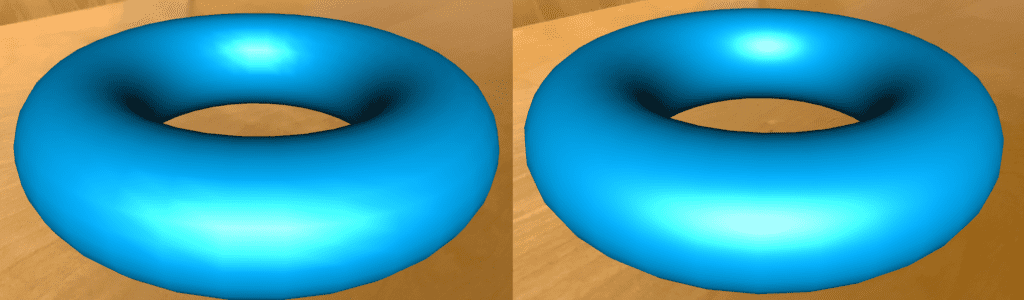
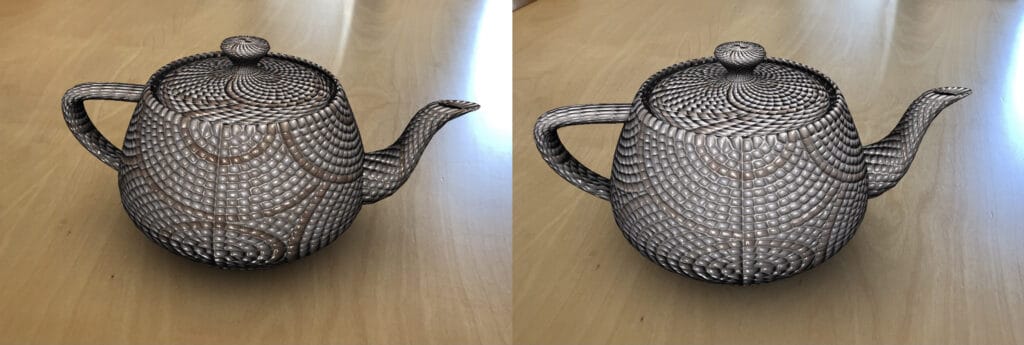
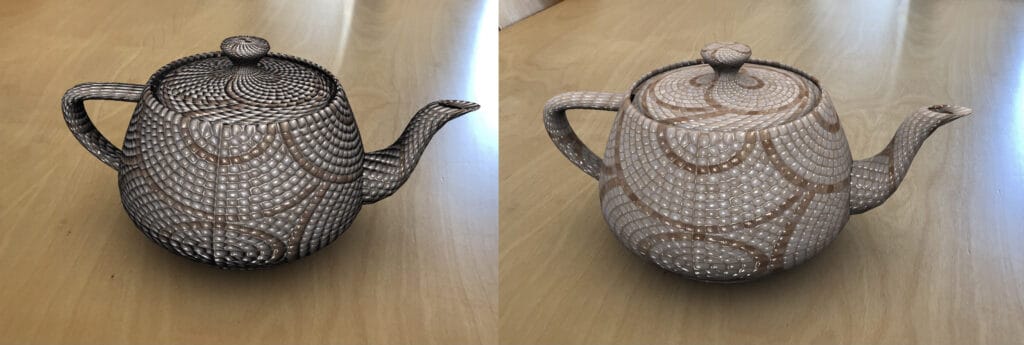
The Simple visualization mode is based on the Gouraud shading method, and is suitable for models where you do not need the most accurate visual appearance, specifically when you are not using normal maps.
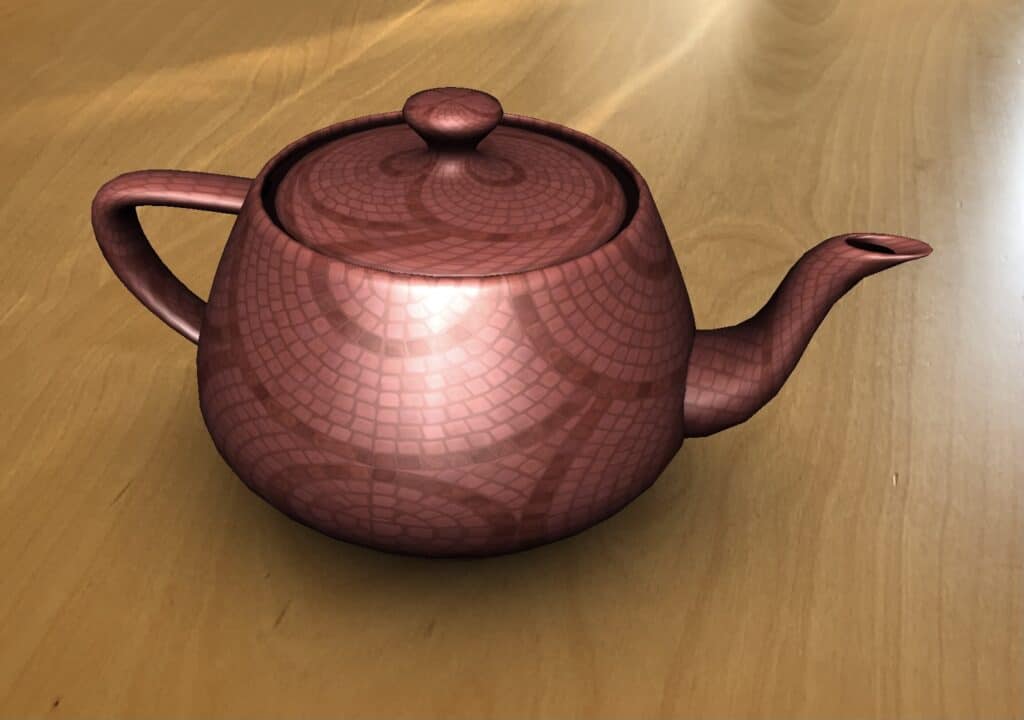
In the above example the material’s base color has been set to red and the final appearance is something reddish with the diffuse texture still visible but not in its original color.
NOTE: The Simple visualization mode considers also the material’s color contribution to both ambient and diffuse final colors, if you do not want this to happen you’d better choose the Simple (Texture Only) visualization mode instead.
The supported texture maps in this case are:
- Diffuse
- Emissive
- Opacity
NOTE: If you compare the above image with the one for Realistic mode you will notice that in the former the model has not as much roughness as the latter because of the missing Normal Map.
Simple (Textures Only)
The Simple (Textures Only) visualization mode is exactly the same as the Simple mode but it does not mix the material’s diffuse and ambient colors with the diffuse texture and ambient contribution.

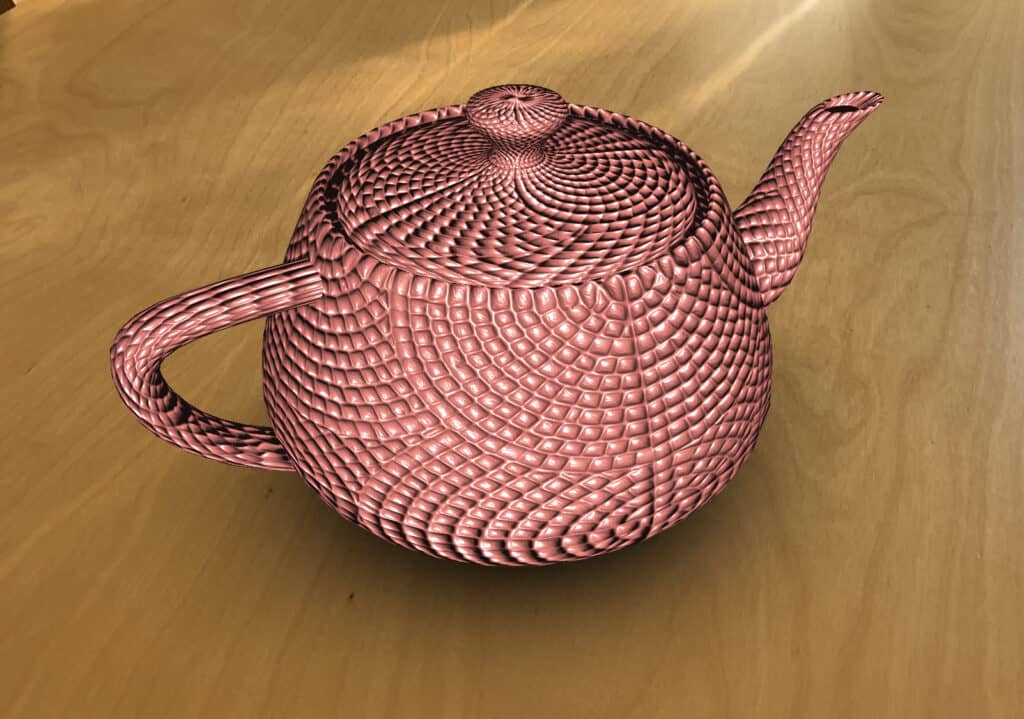
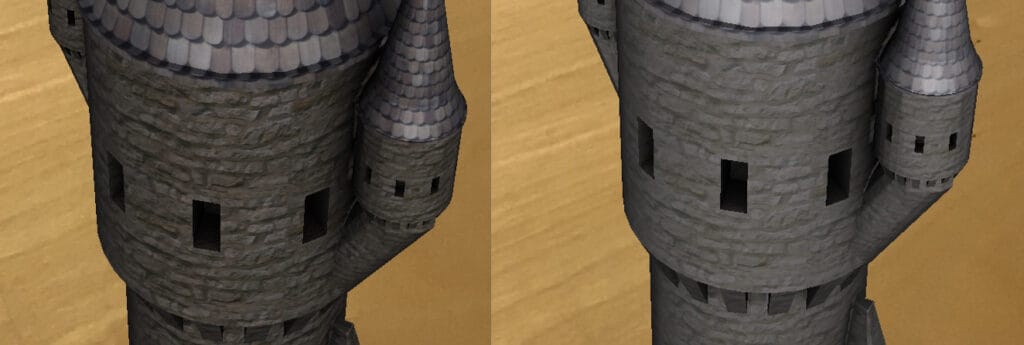
Realistic
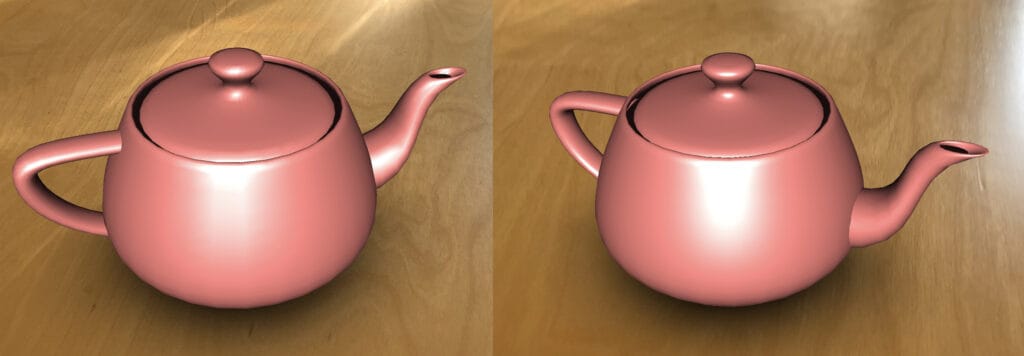
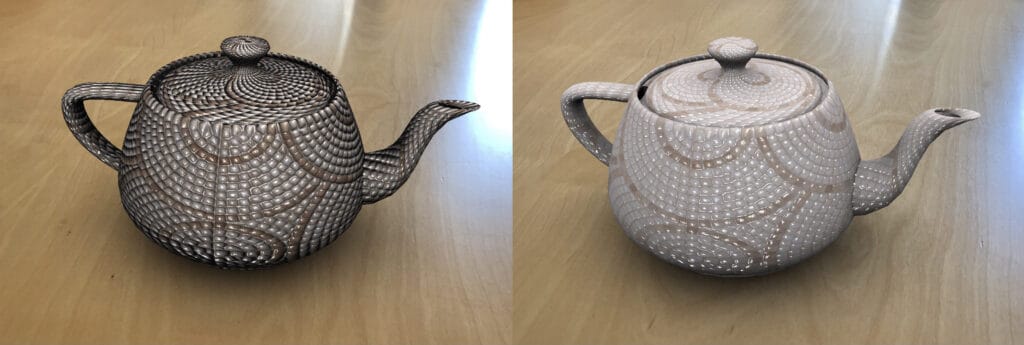
The Realistic visualization mode is based on the Phong shading method, and is suitable for models where you need the most accurate visual appearance, specifically when you are using normal maps to provide fine details onto the model’s surface.
In the above example the material’s base color was set to red and the final appearance is something reddish with the diffuse texture barely visible and not in its original color.
NOTE: The Realistic visualization mode considers also the material’s color contribution to both ambient and diffuse final color, if you do not want this to happen you’d better choose the Realistic (Texture Only) visualization mode instead.
The supported texture maps in this case are:
- Diffuse
- Emissive
- Opacity
- Normal
Realistic (Textures Only)
The Realistic (Textures Only) visualization mode is exactly the same as the Realistic mode but it does not mix the material’s diffuse and ambient colors with the diffuse texture and ambient contribution.
Photogrammetry
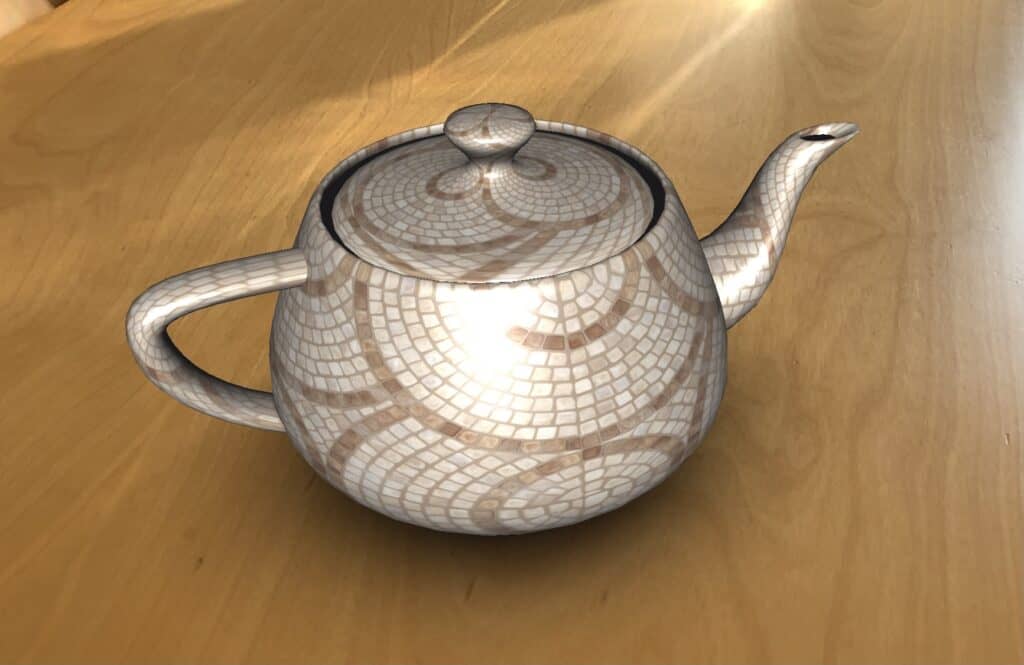
The Photogrammetry visualization mode is used for models that use textures usually coming from photogrammetry (this meaning that already includes all the information related to color and shadows as well).
The only supported texture map in this case is:
- Diffuse
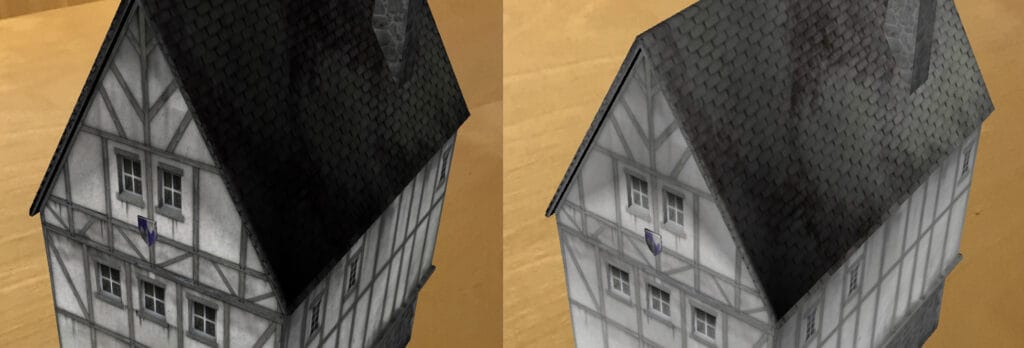
This mode gives best results when used in combination with the Ignore Diffuse/Ambient Lighting option.
Visualization Modes Options
Regardless of the selected visualization mode, you can enable or disable a few more options that will affect the final visual appearance of your models.
Gamma Correction
You can enable gamma correction for diffuse textures by checking this option.
Ignore Diffuse/Ambient Lighting
When checked this option will let the rendering engine to ignore the lighting contribution for the diffuse and ambient components. This is especially useful when you want to display models coming from photogrammetry where textures already contain both the color and shading of the object’s surface.
You can use both Gamma Correction and Ignore Ambient/Diffuse Lighting at the same time depending on the specific cases:
Materials Properties and 3rd Party Software
In this section you can find details about how to setup materials in various 3D content creation software.
Trimble® SketchUp
In SketchUp you simply pick the material/texture/color to assign to a model and it will be used as a diffuse map within the AR-media Studio platform.
TIP: When you upload a model from SketchUp into the AR-media platform it could be sufficient to use the Simple visualization mode, this would make your models faster to visualize on the mobile app.
Autodesk® 3ds Max®
In this section you can find how to setup supported maps in Autodesk®3ds Max®:
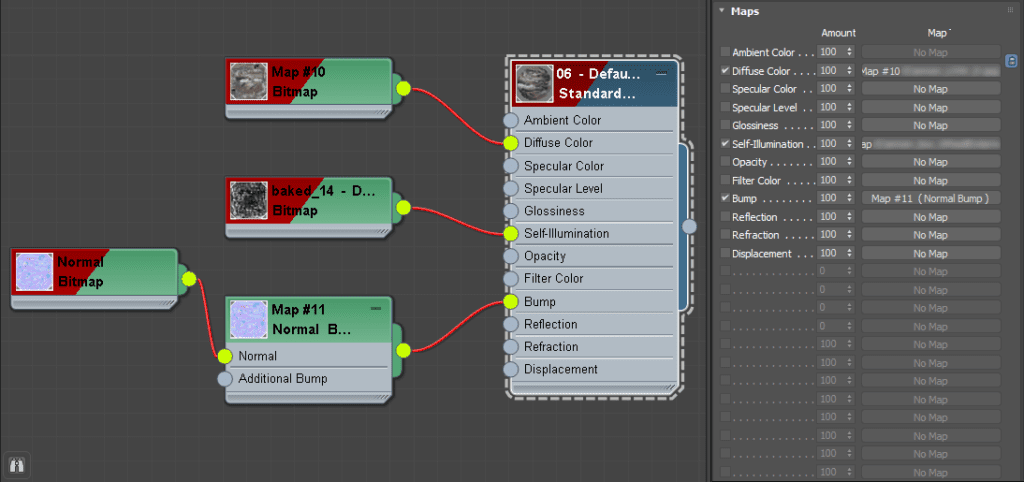
As you can see, the maps supported by the AR-media Studio platform correspond to specific 3ds Max slots within the Standard Material:
- Diffuse Map -> Diffuse Color slot
- Emissive Map -> Self-Illumination slot
- Opacity Map -> Opacity slot
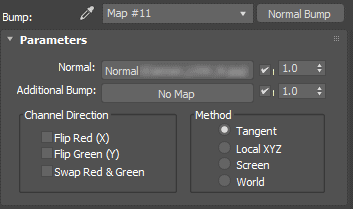
- Normal Map -> Bump slot (with Normal Bump texture)
NOTE: When using normal maps be sure to set the material’s Bump map with the Normal Bump type otherwise you may not get the results you expect.
Appendix
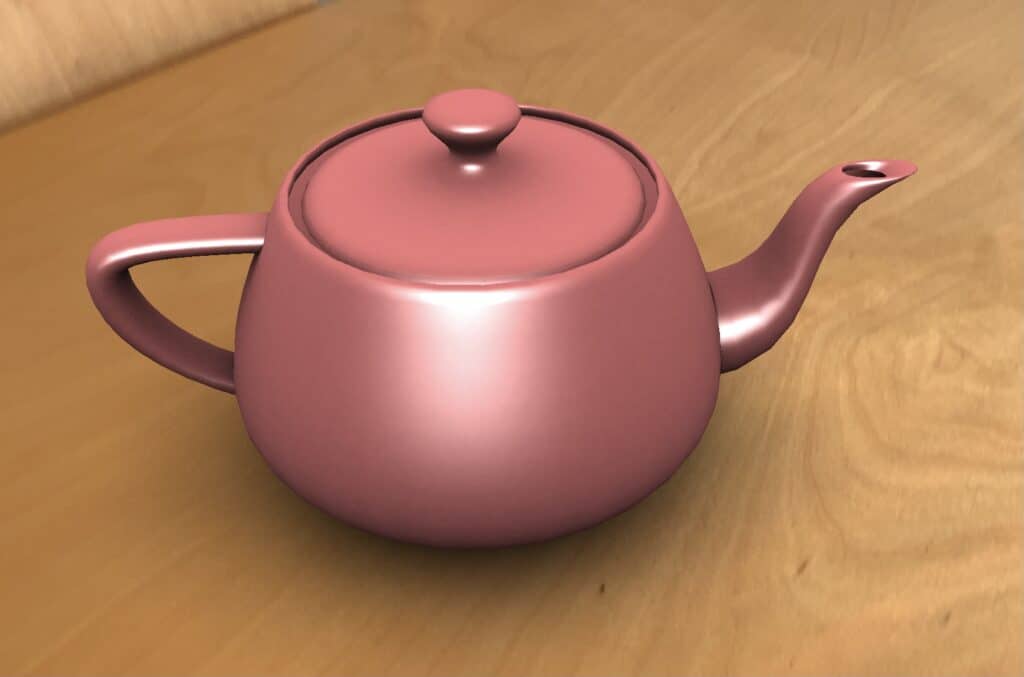
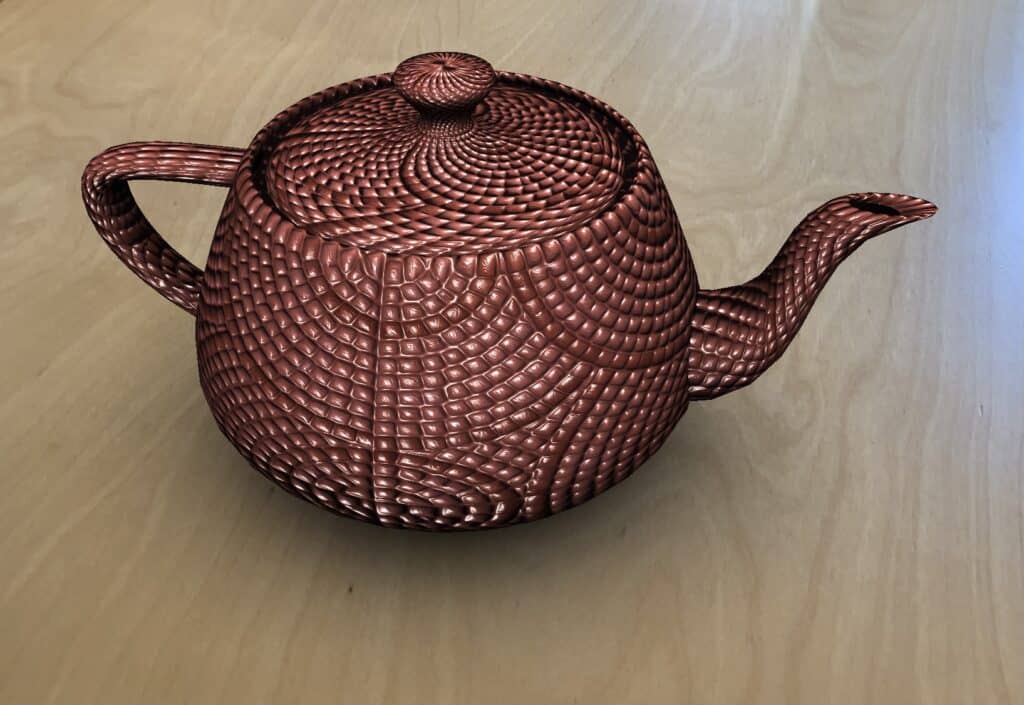
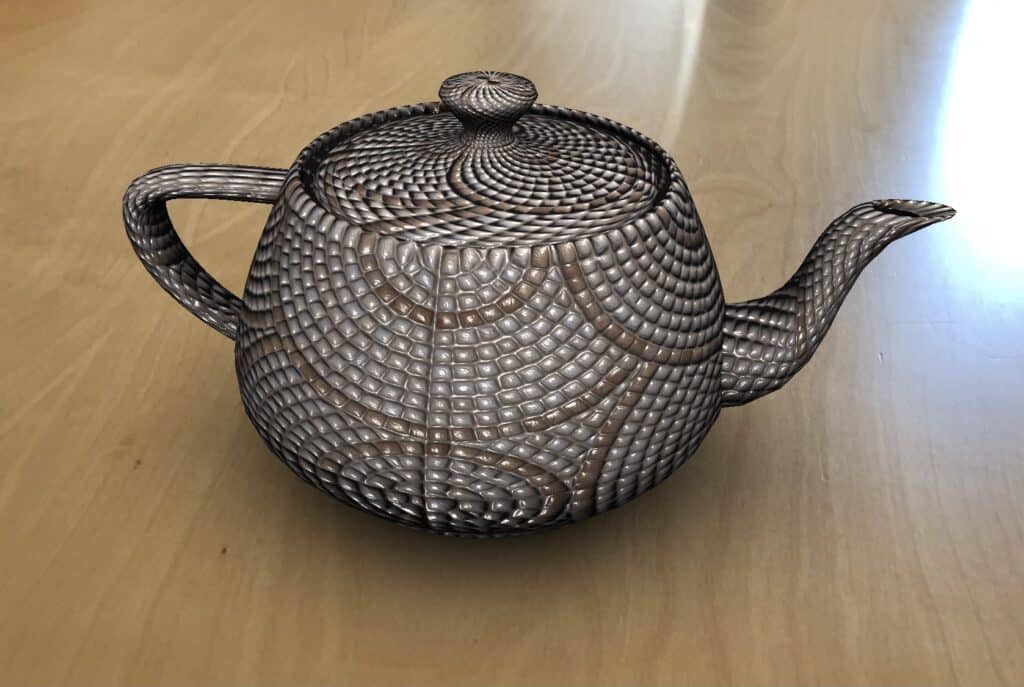
For your reference here you can find images rendered by Autodesk® 3ds Max® of the teapot model used throughout the discussion.
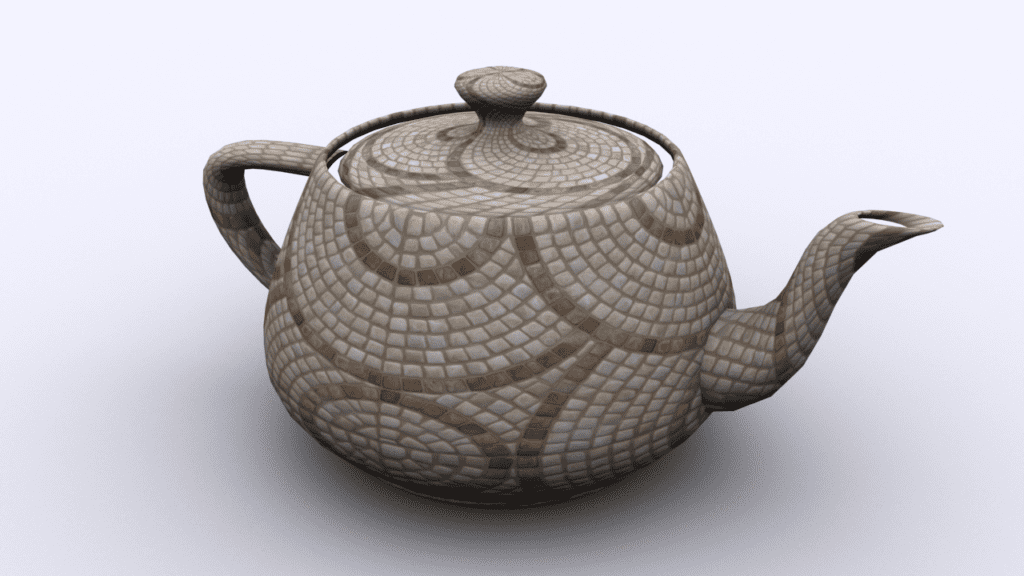
NOTE: In the preceding examples, before exporting the model, specular highlights have been deliberately exaggerated by using stronger values (if compared with the above render) to let you appreciate the results more easily and to make the differences among the Simple and Realistic modes more noticeable.